Ask Question
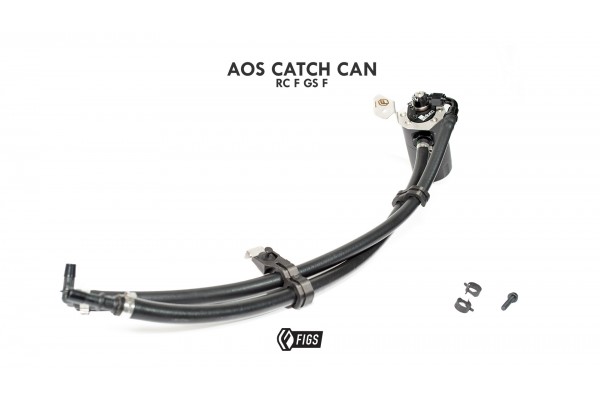
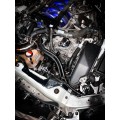
This installation kit was specifically designed for the Lexus RCF and GSF with the 2UR-GSE engine. No drilling or permanent modifications are required other than intercepting the factory PCV hose.
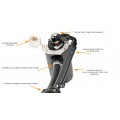
An oil catch can is essential on a performance vehicle to protect the engine from elevated levels of crankcase blow-by accumulated from everyday driving. Excess oil-saturated air circulating back into the air intake stream can lead to degraded performance. Radium Engineering catch cans feature large 10AN ORB ports, a 4AN ORB drain port, 2-step oil separation baffling, and an O-ring sealed dipstick.
Features:
- Effectively raises the octane and increased engine performance from cleaner inlet air
- Prevents oil buildup in the intake, throttle body, intake manifold, etc.
- Excessive oil collection can be an indicator of a damaged engine.
- Lowers hydrocarbon emissions
- Capacity: 7 fluid ounces
- Height (without fittings): 5 inches
- Outside Diameter: 2.45 inches
PCV STANDARD Kit Includes:
- FIGS Custom-designed mounting brackets to attach to the ECU cover.
- Molded barb fittings to intercept factory PCV hose.
- Constant tension spring clamps for hose connections.
- Billet oil catch can with integrated condenser and dipstick
- Anodized aluminum 6AN and 3/8" barb hose ends
- Anodized 6AN and 10mm Barb adapter fittings
- Stainless steel mounting hardware
- PCV rubber hose- will not sweat when contacted by fuel and oil.
- FIGS Custom mounting bracket and hose divider for a clean installed look.
General Instructions:
-Remove Engine plastics both cover and fender.
-Remove ECU cover mounting screw on the side closest to the fender.
-Route hoses, PCV return to the intake is the straight connector on both sides, route this under the large harness by the ECU. Route 90 degree hose on top of this harness.
-Pre-install mounting bracket with 4 M5 flathead screws with 3mm wrench or T15 Torx.
-Cut Engine PCV hose just at the bend going up to the intake. You will need to pull back the outer loom and the foam on the factory PCV hose. This is critical that you cut where the diameter is small so that the barb union will be able to seal.
-Roll back insulation on the PCV hose on both sides further if needed. Install the 90-degree barbed coupler and constant tension clamp into the straight side headed back down to the crankcase.
-Use hose clamp pliers to install the tension clamp on the hose from the PCV, just past the hose barb.
-Install the straight hose section into the bent PCV hose. It helps to remove the connection to the intake, and we added a new hose clamp just incase your's has lost its spring.
-Install the CT-spring clamp on the straight fitting, just past the barb.
-Install the Intake connection and the new spring clamp if desired.
-Install the first line separator on the grounding screw, just above the driver's side cam cover. The stainless bracket should be installed with the tab bent downward, so it will cover the fastener head.
-Slide the separator onto the bracket in the narrow slot with the FIGS F logo facing up. Place the plastic rivet in the hole to lock the bracket in place.
-Snap the hoses into the line separator- OPTIONAL: Use zip ties to hold the hoses, but do not clamp too tight as to cause restriction. The separator has a passage for 2 narrow zip ties.
-Fine-tune the position of the line separator by hand so the lines are not resting on the radiator hose.
-Connect the AN fittings and connectors to the catch can with a AN wrench, just past seating, and install the catch can on the ECU cover with the single M6 screw with 5mm hex wrench, torque to hand tight. If Petcock ordered, see below.
-Install the second line separator to preference to maintain hose separation by the ECU cover.
-If desired, install small foam strip betwen catch can and head light to decouple abrasion.
-If the Petcock kit was ordered, remove the lower plug in the catch can and install the Petcock barb fitting. Determining the location of the Petcock and routing for easy access, remembering things will likely be hot when draining.
-After Petcock is installed, rotate the catch can into place and route drain hoses to the desired location.
-Replace all covers and make sure there are no vacuum leaks. The best way to check this is to spray some throttle body cleaner at the connections and make sure the engine idle is not affected. If the car ever idles rough or air metering is off, always check these connections as any leak will impact MAF metering and potentially cause an issue.
This product is intended for OFFROAD USE ONLY. The customer assumes all liability for the installation and inspection of the system continuously. If there are any questions you can always contact us for assistance. By purchasing this item you agree to these conditions and our general conditions and terms.
| Lexus | RC F | 2015-2023 | |
| Lexus | IS500 | 2022-2024 | |
| Lexus | GS F | 2016-2020 |
FIGS/ RADIUM ENGINEERING STANDARD AOS CATCH CAN KIT FOR THE RCF GSF IS500
- Brand: FIGS Engineering
- Product Code: L1374
- Availability: In Stock
-
$372.75
Available Options
Tags: is500, is, 500, AOS, separator, rcf, rc-f, gsf, gs-f, pcv, oil, catch, can, blowby, boosted, supercharged, supercharger, air, oil, blow, by, blow-by, air, oil, seperator

